Click to Pay lets customers save their card once with Visa, Mastercard, or American Express, then pay on any supported site by picking it from a list, no need to retype card details. Through
Guide
Set up the Solidgate payment form with step-by-step instructions for script loading, container mounting, and payment request configuration.
Payment Form,
Click to Pay, powered by Unified Checkout Solutions, provides an interface to accept Visa, Mastercard, and American Express while keeping the regular card form on the same checkout page.
Customers can pay without entering card details manually on your page. Instead, they use their Click to Pay wallet, which is integrated directly into payment form: card schemes securely store the cardholder data and issue a token for each payment.
Customers can create Click to Pay accounts with Mastercard, Visa, or American Express, or with their issuing bank when supported. At checkout, recognized customers select a preferred card from their Click to Pay account to complete the payment.
Card schemes describe the customer experience in similar terms. Public schemes and industry write-ups often list design goals such as:
- Reduce the need to enter account numbers and passwords during checkout flows.
- Provide a simple and consistent digital checkout experience.
- Help make payment credentials less vulnerable to fraud.
This is the end-to-end picture at merchant checkout before you wire layout, events, or API details.
- Presentation at checkout
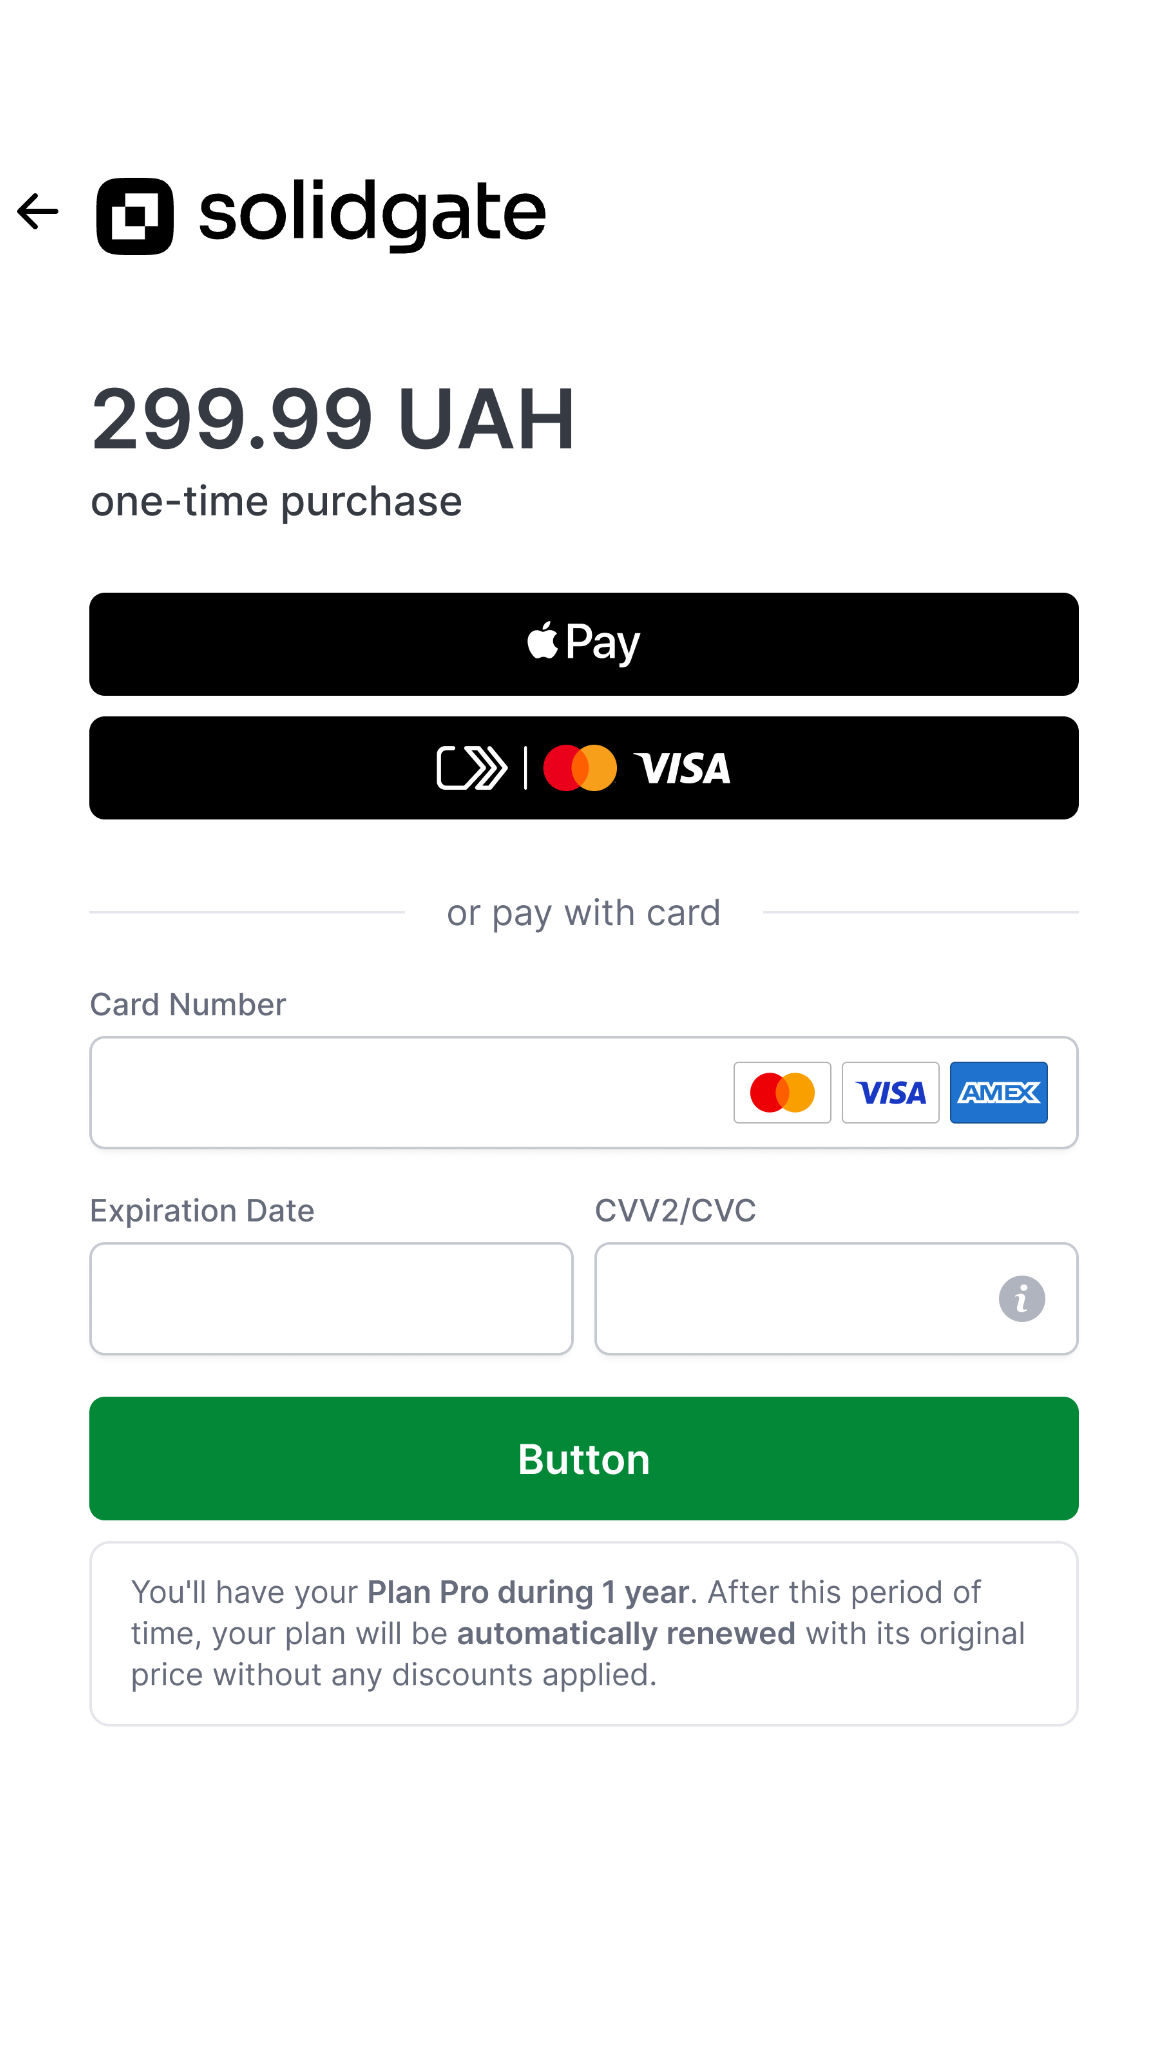
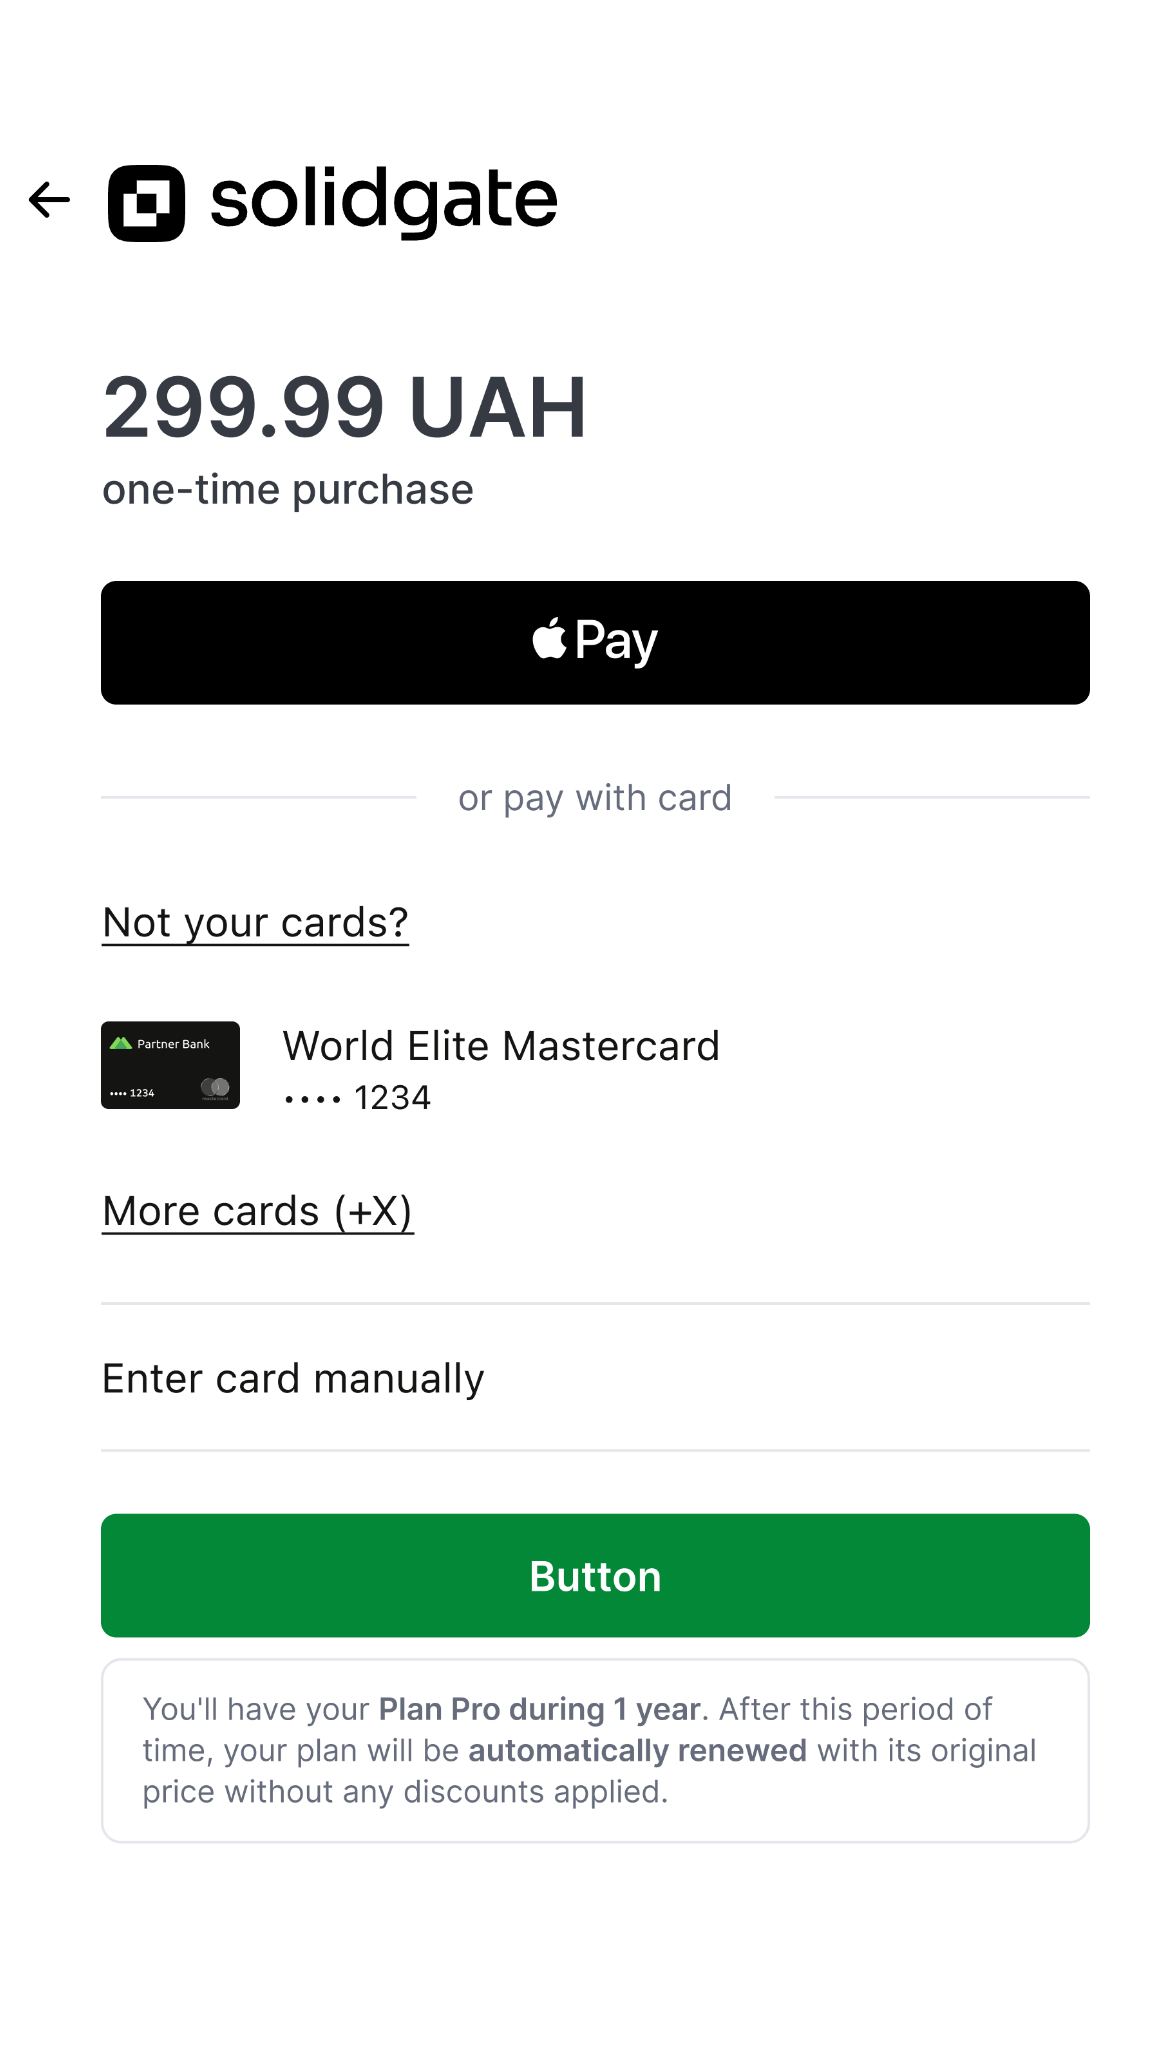
Payment Form shows Click to Pay next to the regular card form so the customer can choose either path. Card-scheme rules treat both as first-class options; the SDK layout section below explains how that visibility is enforced. - Click to Pay selection
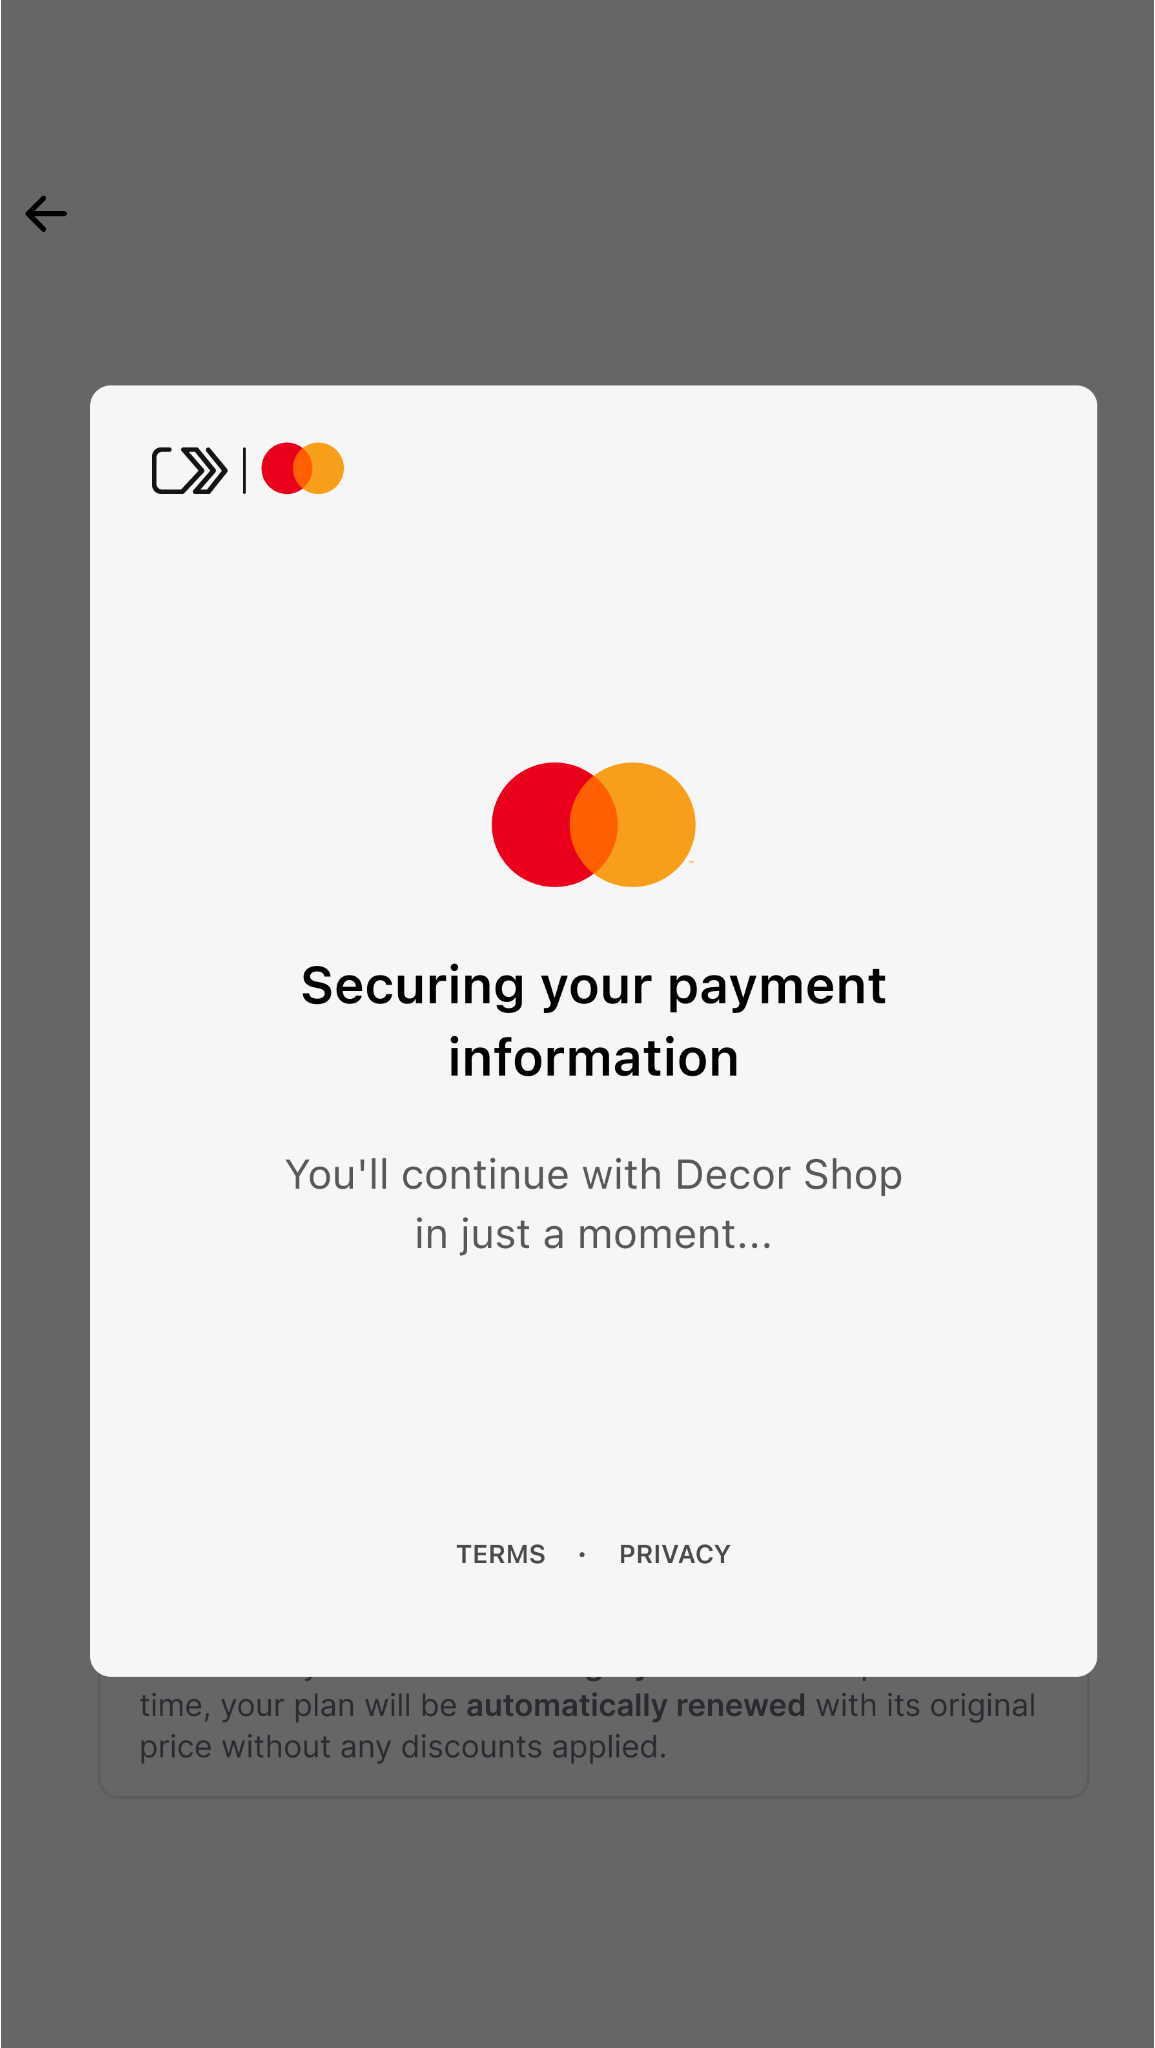
When the customer uses Click to Pay, scheme-side services handle profile recognition, step-up when required (for example, a one-time password on an unfamiliar device), and picking a stored card. Solidgate payment form card fields are not where primary account numbers are captured for that path. - Payment completion
SRC wallet output is supplied into the session, and Solidgate continues on card rails like your other supported card traffic, subject to token handling and reuse limits described later on this page.
Click to Pay works only through Solidgate Acquiring. It is not offered on other Solidgate processing paths.
To join the Early access , you need a Solidgate Acquiring connector account and to be onboarded to Unified Checkout Solutions (UCS). During onboarding, your merchant legal entity is mapped to a UCS identifier, which the wallet uses to attribute traffic to your account. UCS onboarding is not self-serve: contact your Solidgate account manager.
Checkout flows

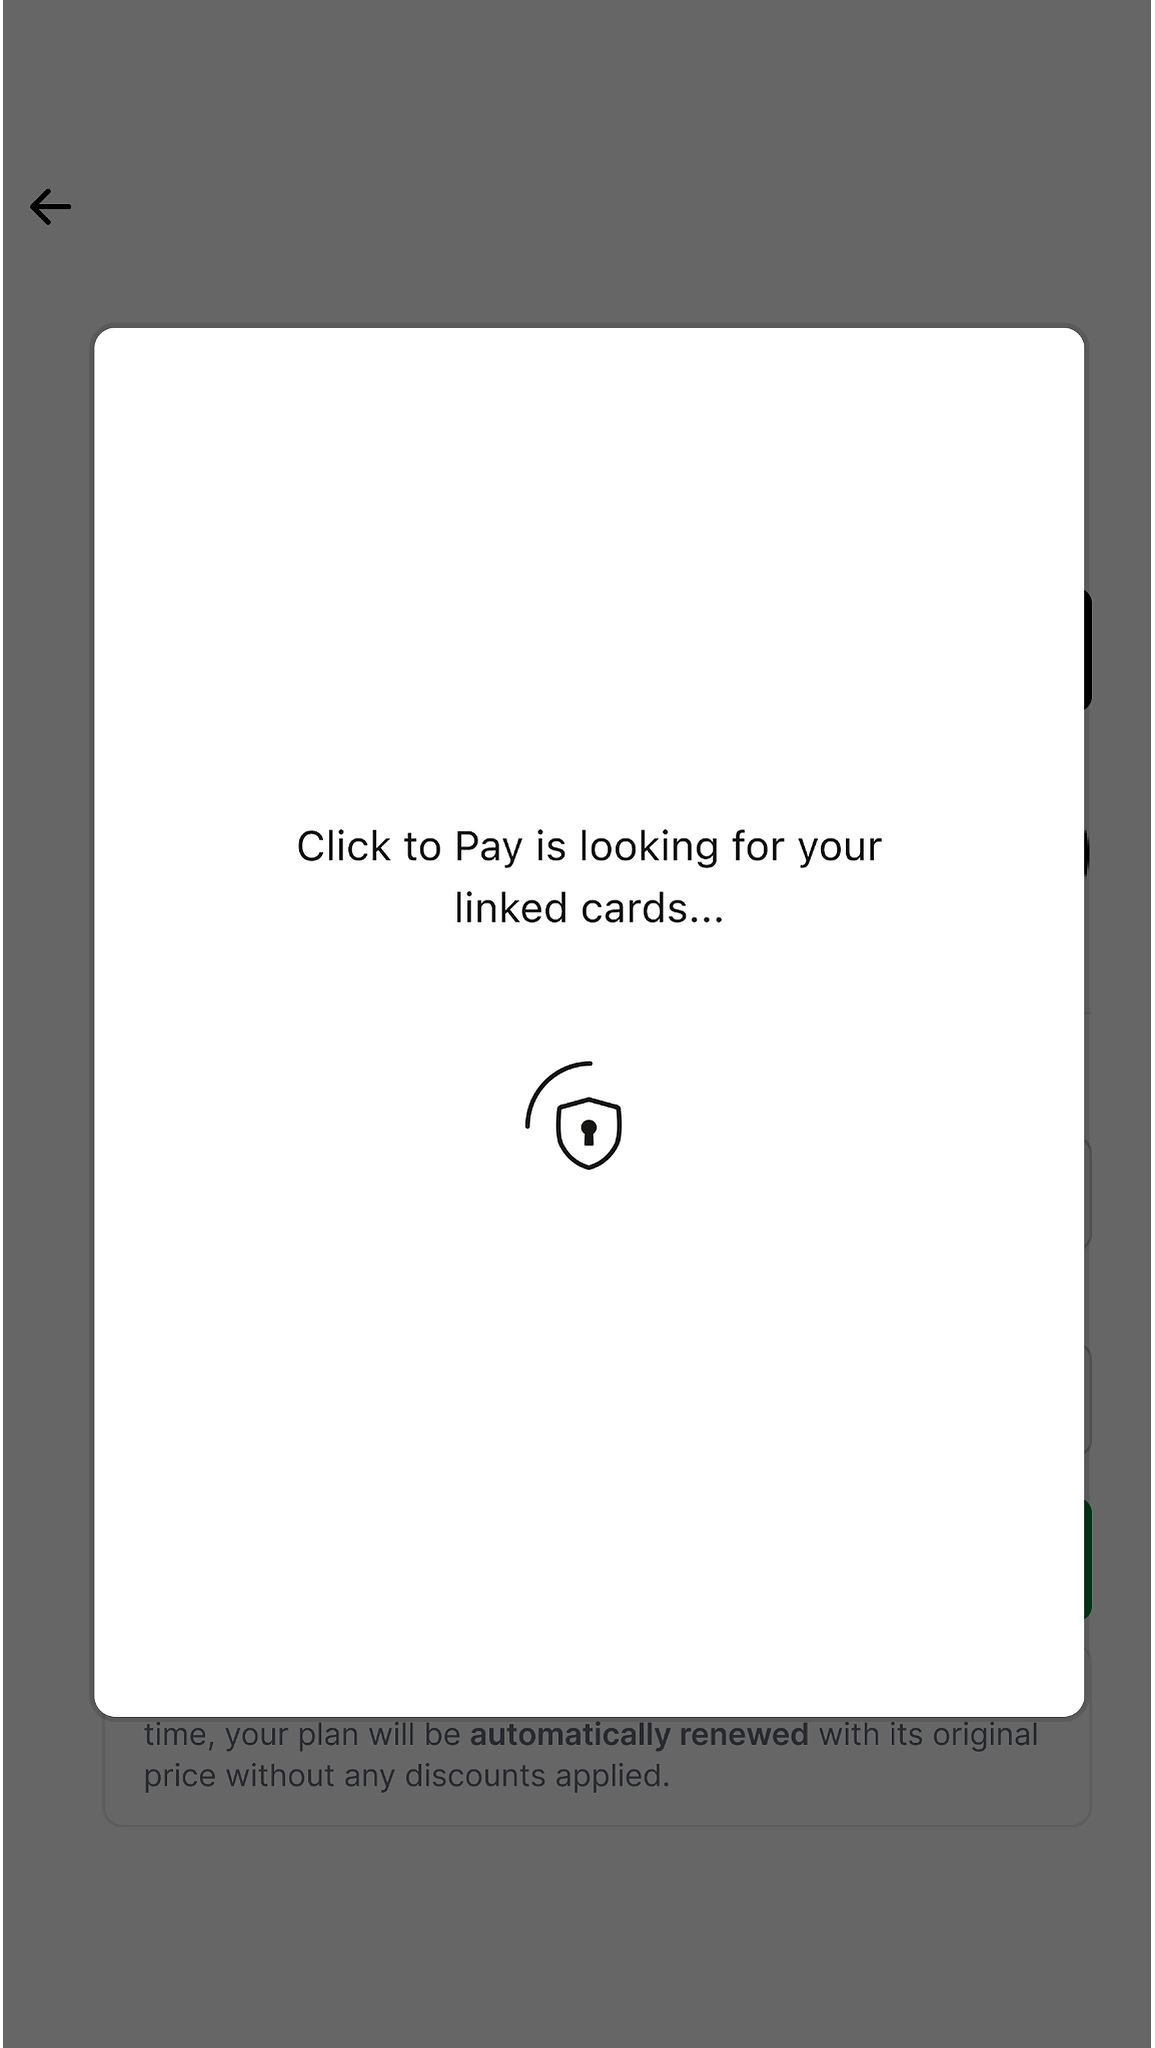
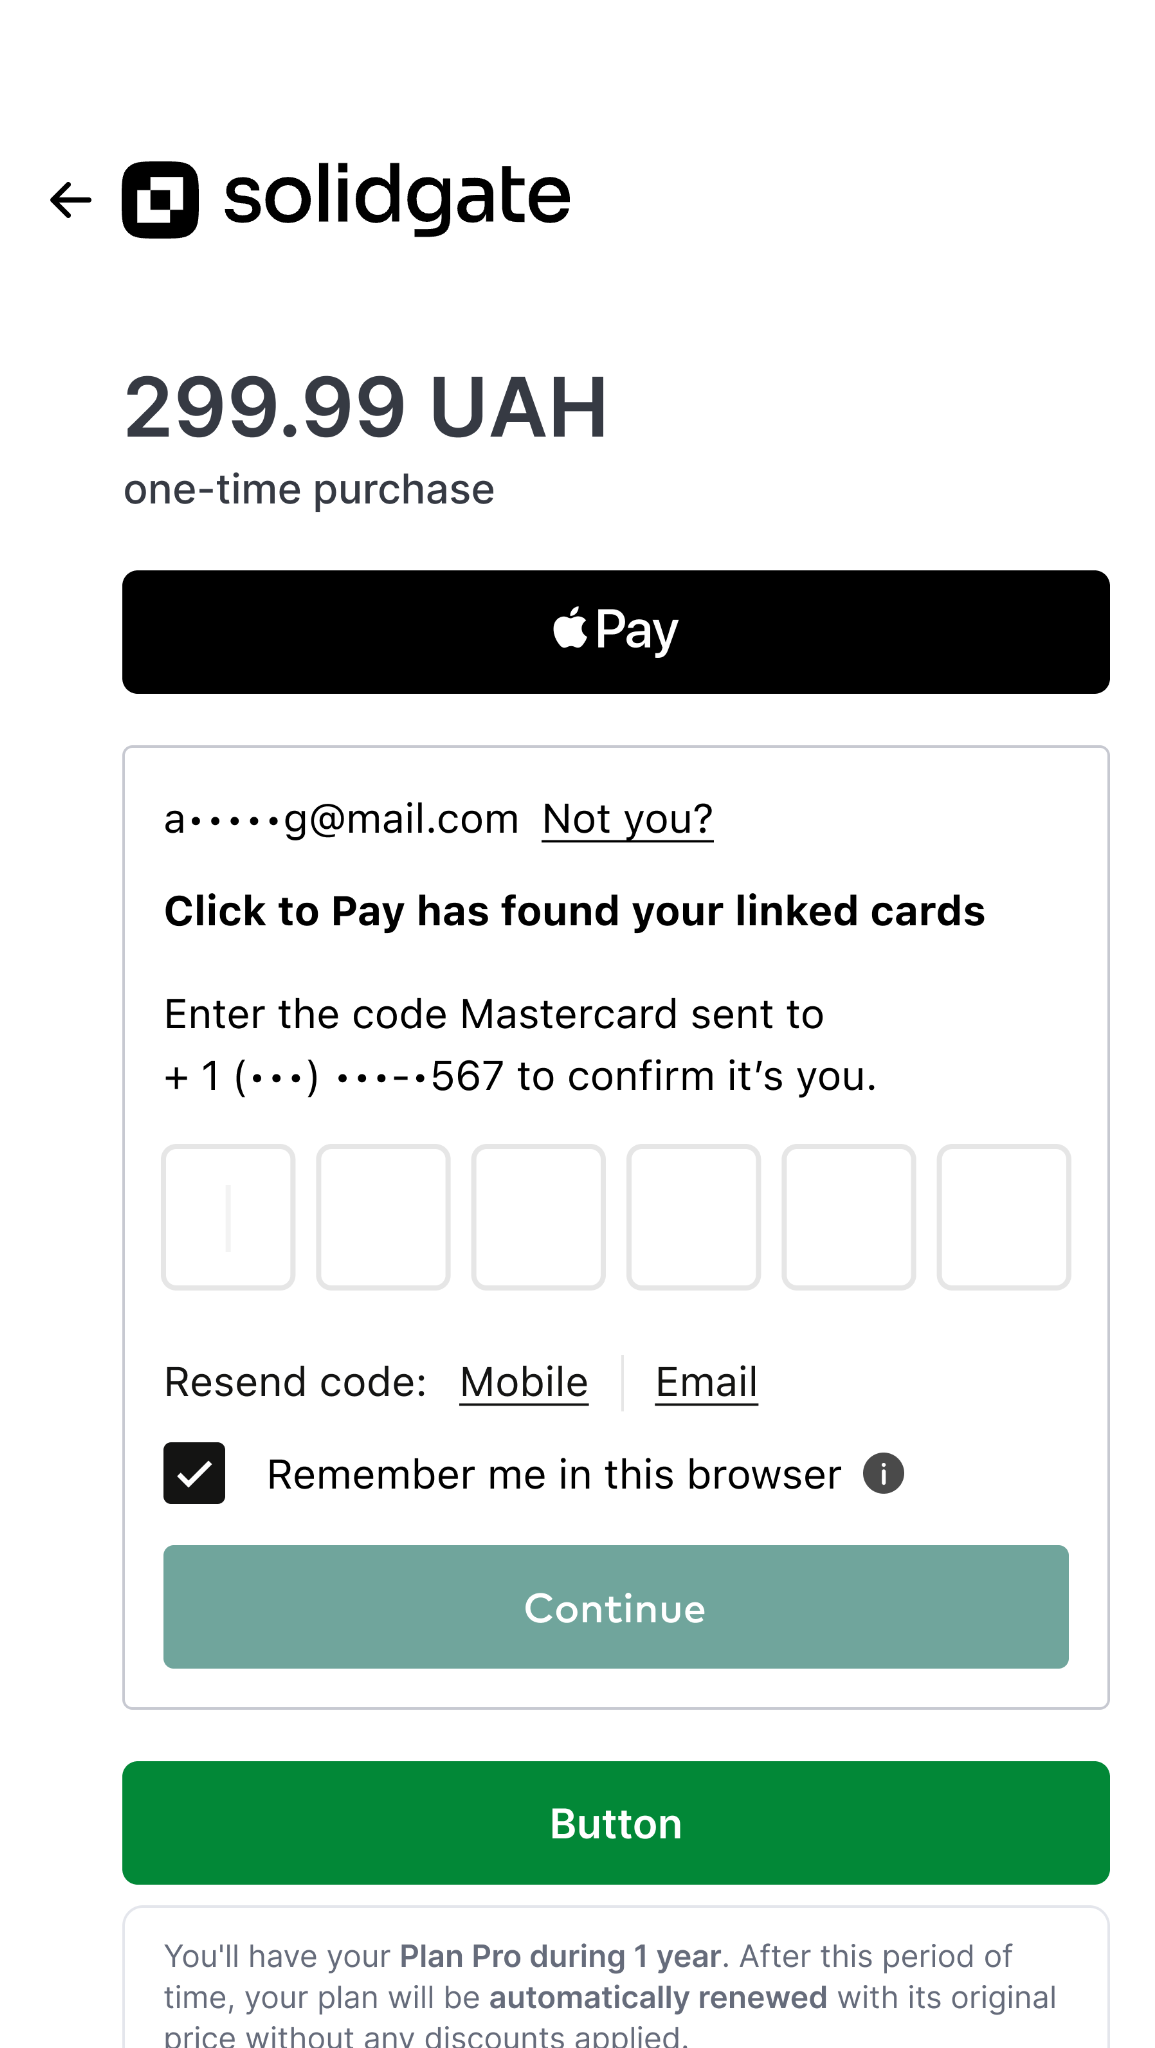
Which checkout flows run depends on whether Click to Pay recognizes the customer in the current browser (for example, via scheme cookie or recognition token) or must look up or enroll the customer.
Checkout duration: The customer-visible path is longest for first-time use. Scheme flows stack actions such as collecting email and mobile to anchor an ID, passing consumer and billing details the wallet requests, entering card data in the scheme experience, one-time-password or similar verification, consent to save the card to Click to Pay, and any enrollment notices. A recognized device usually skips most of that: stored cards appear quickly and the customer mostly picks a card and confirms.
The customer does not yet have a usable Click to Pay context in this session (no profile ready to pay without enrollment-style steps). In typical scheme first-time experiences, the customer may supply email and phone number to create or link an ID and cards, while your integration supplies consumer and billing fields the flow asks for. The customer can still pay by manually entering a card, then choose whether to enroll that card for later Click to Pay checkouts.
- Provide identity details
The customer enters email, phone, or other identifiers the scheme requests and advances through identity screens. - Enter card data and security checks
The customer completes card entry inside the scheme-controlled steps (including CVV or other prompts shown there). - Verify and consent to enrollment
The customer completes verification (for example, SMS or email OTP), reviews terms or notices, and confirms linking the card to Click to Pay for future visits. - Confirm the purchase
The customer approves payment for the order. - SDK and backend
The SDK encrypts data as required and drives the wallet flow; Solidgate receives the checkout payload, fetches order data if needed, and processes authorization like your other card payments.
Merchant takeaway: treat first-time Click to Pay as a multi-step, multi-minute customer journey when you design loading states, session timeouts, and support copy. Do not compare its duration to a returning flow on a remembered device.
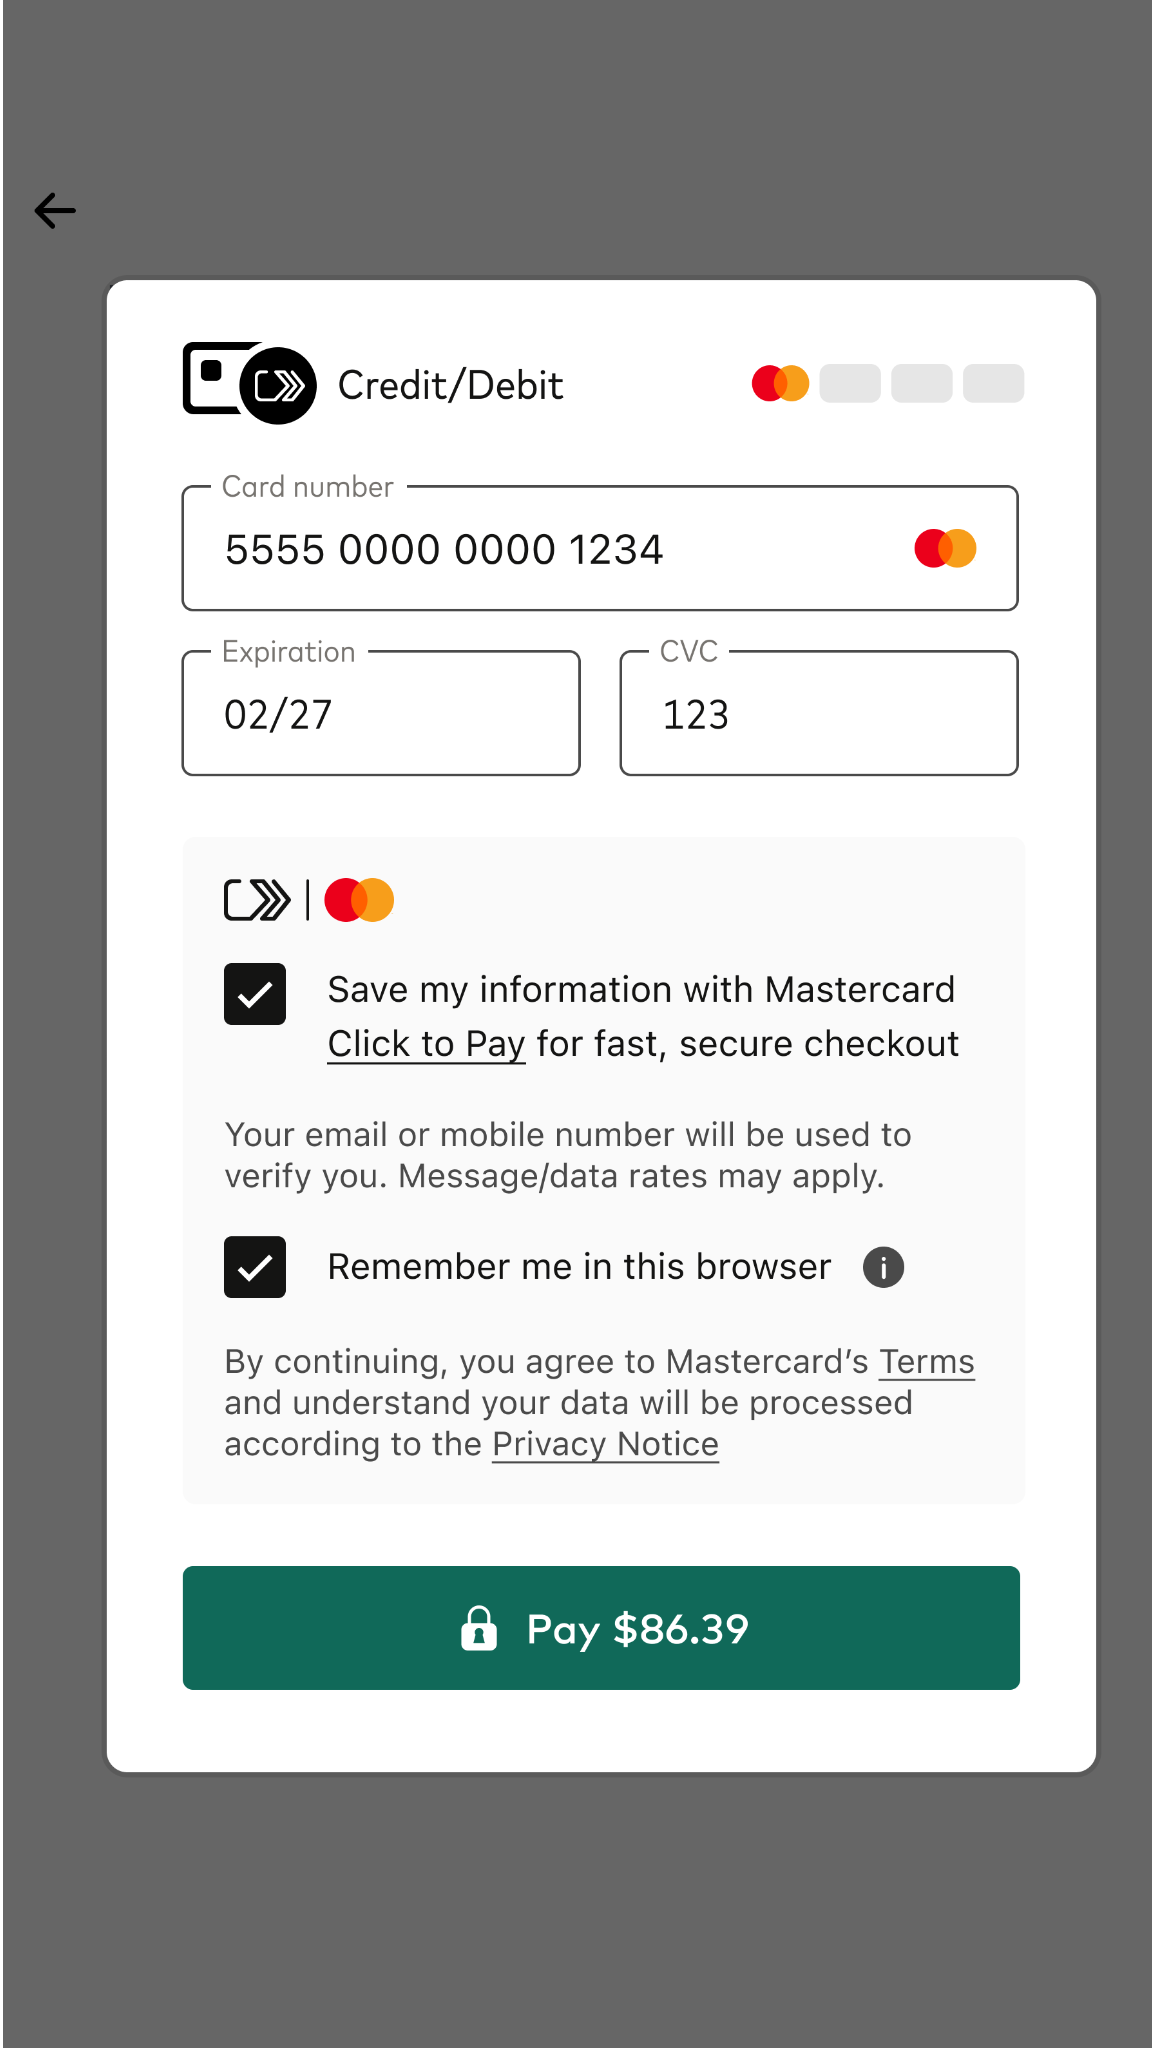
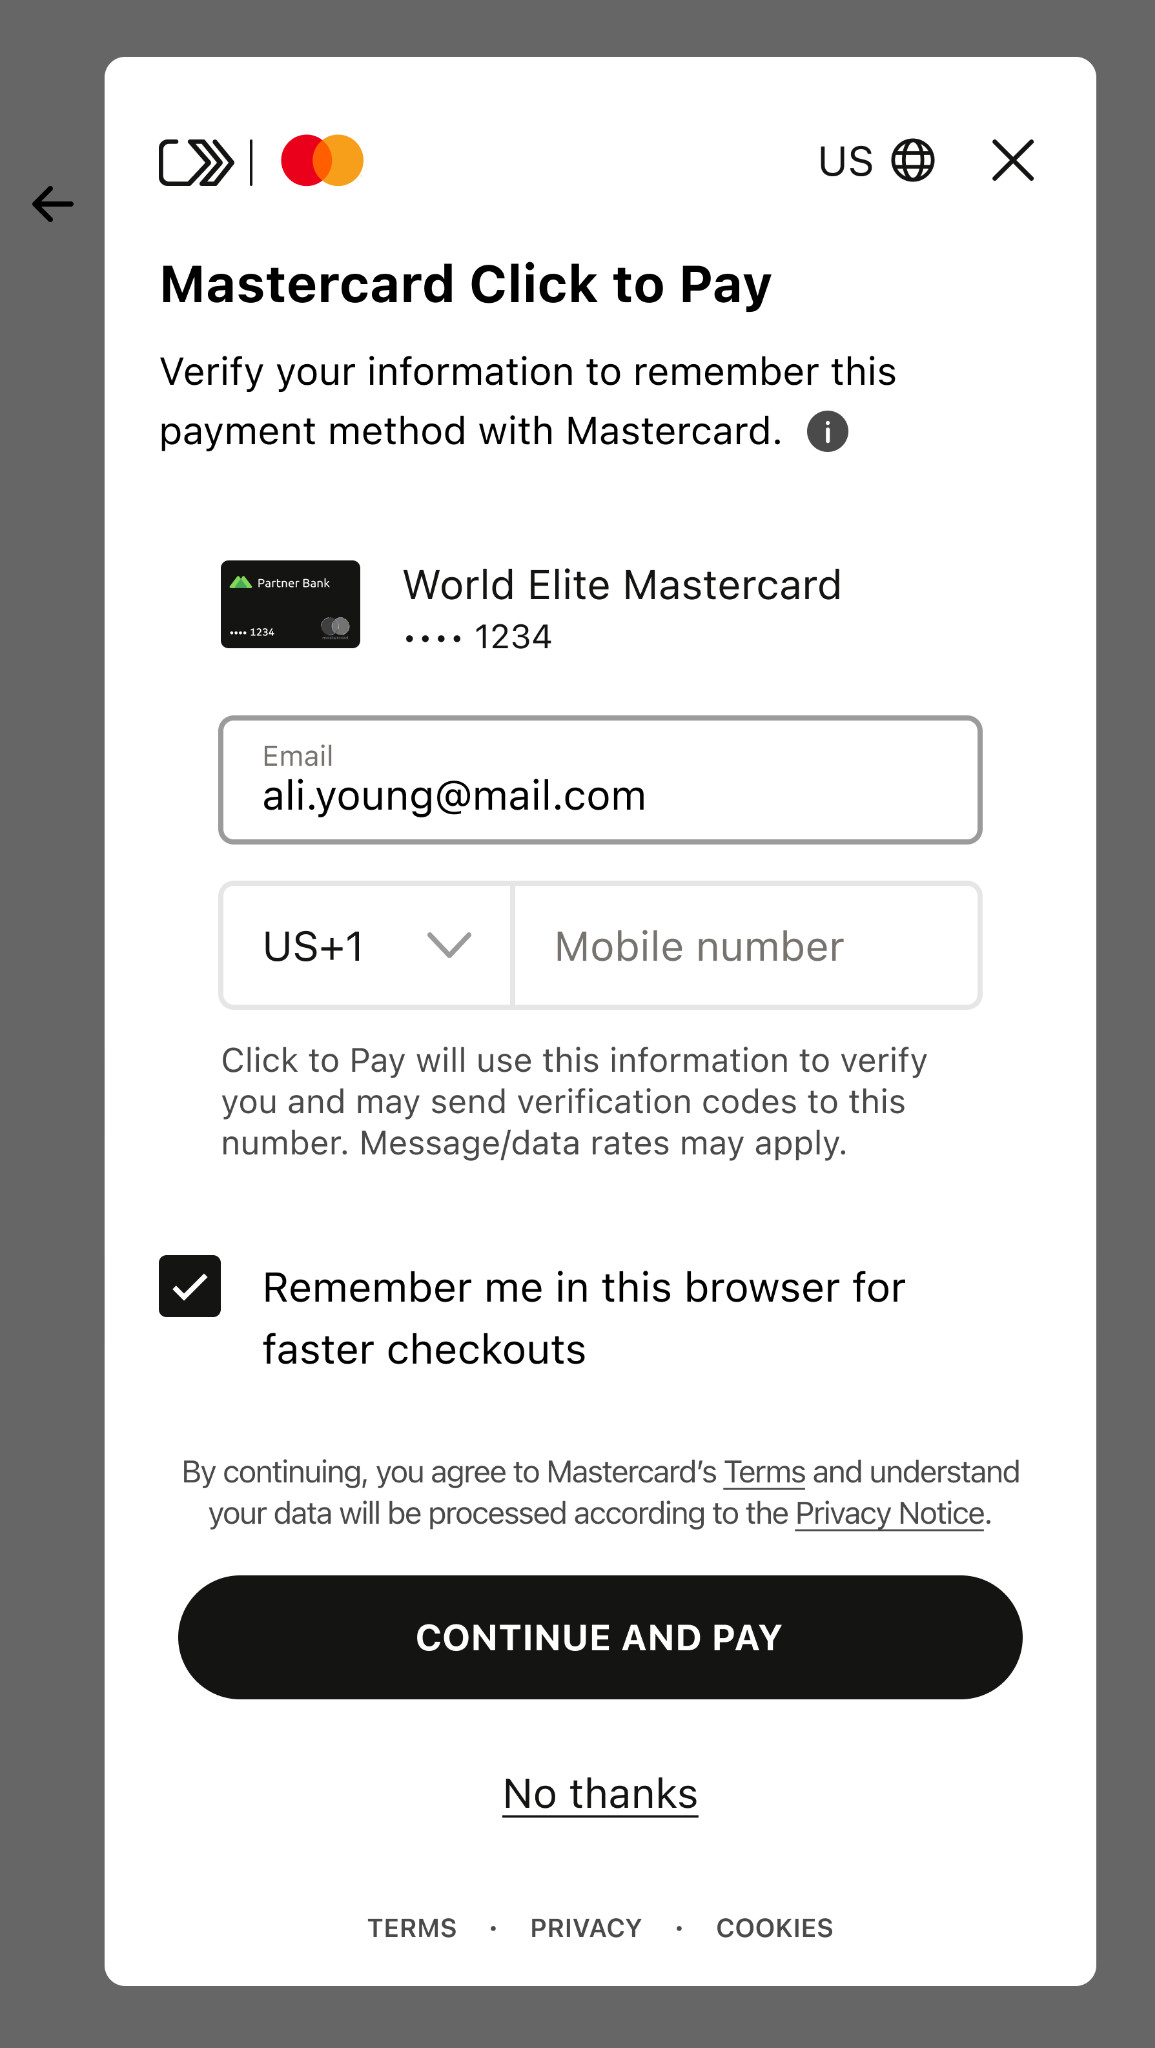

The customer previously agreed to be remembered, and a valid recognition token or cookie is present, so the wallet can show stored cards without repeating the full identity setup.
- See saved cards immediately
During initialization the SDK applies recognition and surfaces cards already on the profile. - Choose a card and pay
The customer selects a stored card and confirms payment, usually without a separate OTP on a trusted device. - Backend
Solidgate processes the payment from the checkout payload.

The customer has a Click to Pay profile, but this browser has no valid recognition artifact. The flow falls back to identifiers, commonly email or mobile, to find the account, then adds verification before showing saved cards.
- Identify the customer
The customer enters email or phone so the scheme can match an existing account. - Verify, then branch
If a profile exists, the customer completes OTP (or similar) to unlock stored cards. If not, the experience continues toward first-time enrollment using the same contact details. - Select a card and confirm
The customer picks a stored card (or links a new card if the flow offers it) and confirms payment. - Backend
Solidgate processes the payment from the checkout payload.
Additional customer choices can lengthen any path: linking a new card to an existing ID during checkout, or opening another Click to Pay profile on a shared device. Those branches usually require verification before a new card list appears.
Payment Form layout
Unlike other
Guide
Add alternative payment method buttons to your payment form with customizable styling, placement, and method-specific display conditions.
pay buttons,
Click to Pay has specific layout rules. The SDK controls button placement and divider rendering to preserve a clear choice between Click to Pay and card form flows.
Click to Pay follows card-scheme UX constraints that differ from Apple Pay, Google Pay, and PayPal flows.
- The customer must always see that both payment options are available: Click to Pay and the regular card form.
- Hiding or obscuring the card form behind Click to Pay is not allowed.
- The SDK enforces this by rendering a divider between Click to Pay and the card form.
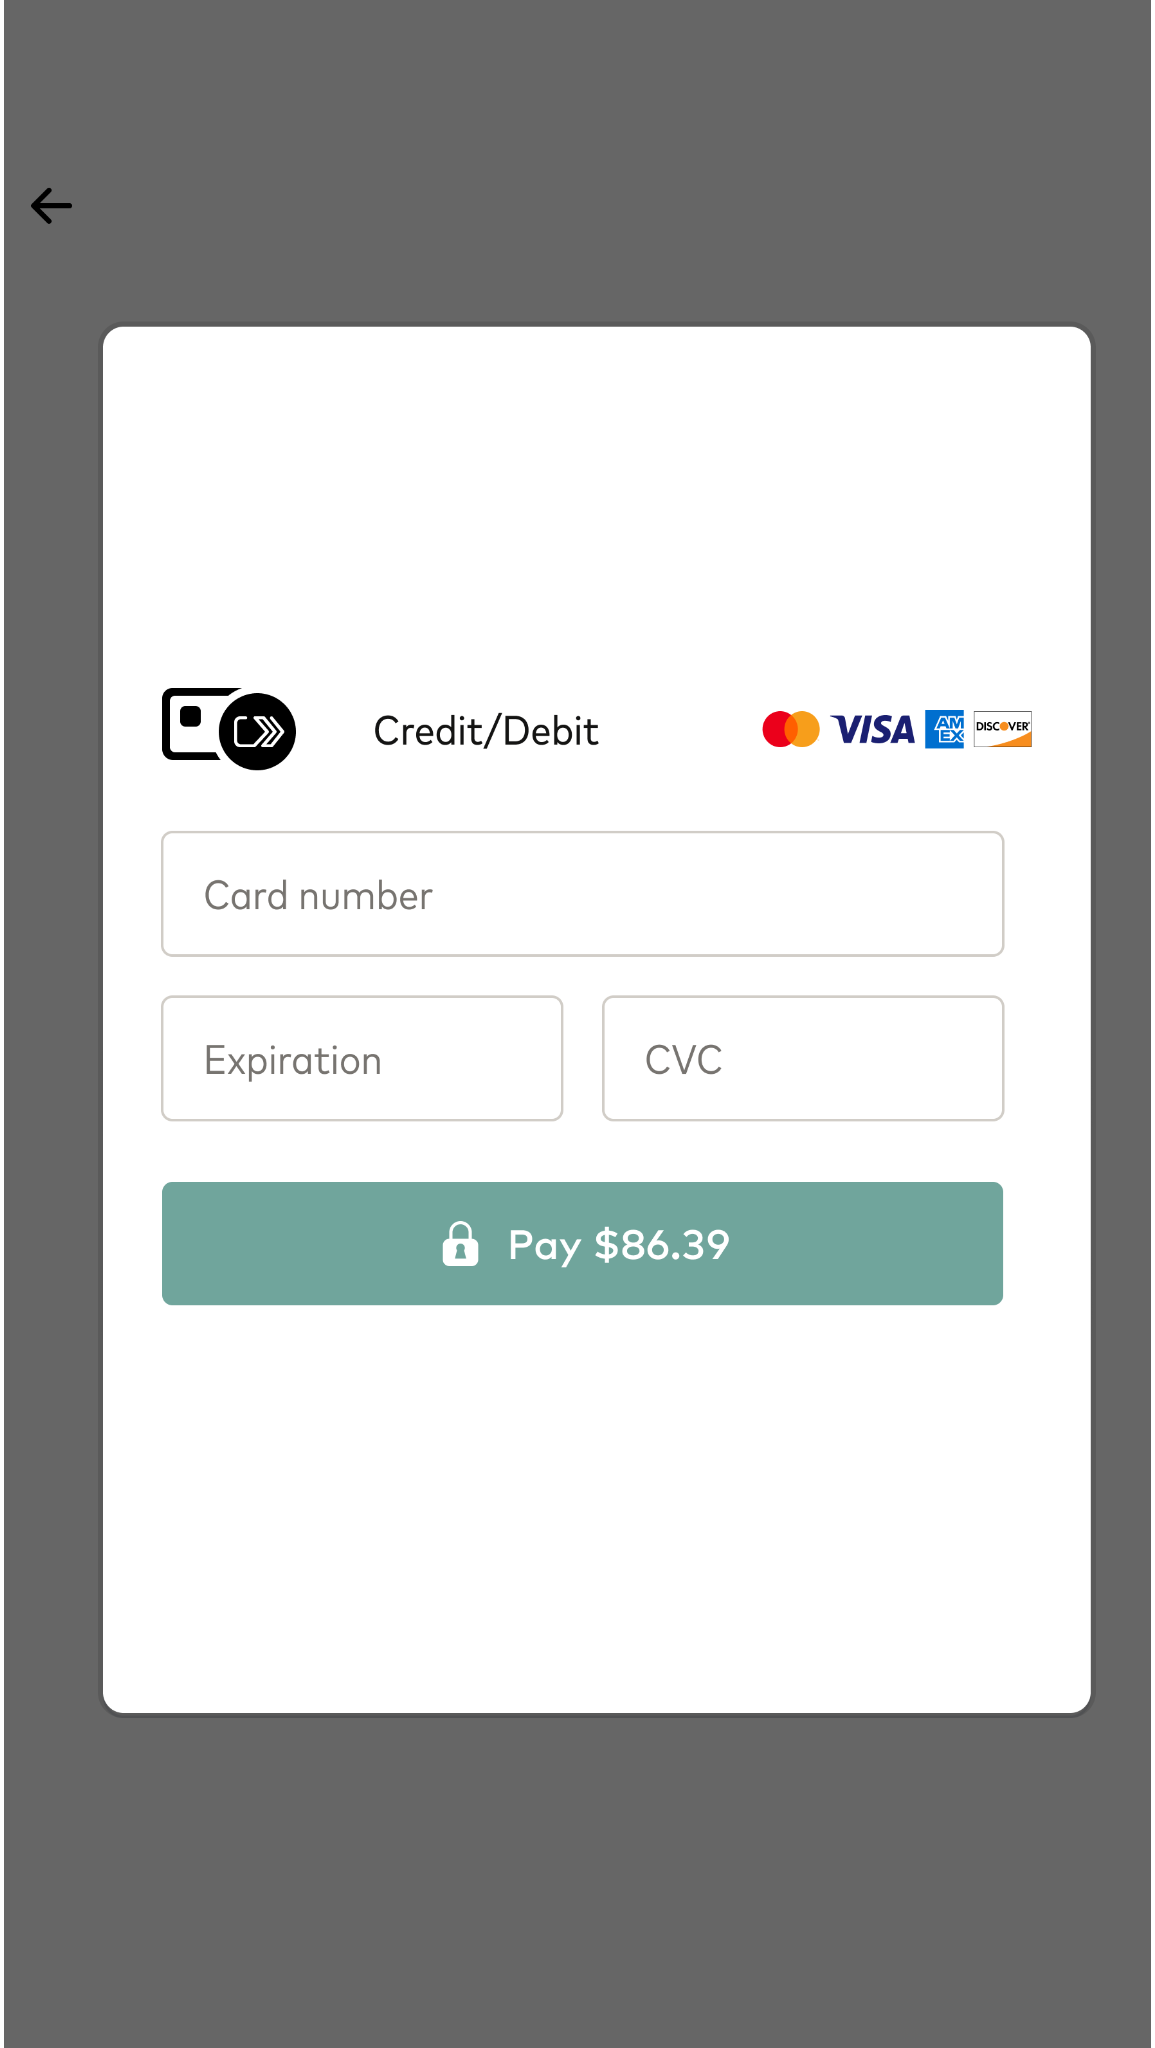
When a customer clicks the Click to Pay button, the payment form collapses into a compact button-like variant. This behavior is required for card scheme compliance. To keep the regular card form visible as an alternative, the SDK continues to render a dedicated divider between the Click to Pay and form flow areas.
Use these rules as a baseline for implementation:
- Do not set
containerIdfor Click to Pay
TheclickToPayButtonParamsobject does not supportcontainerId. - Keep card form visible as an alternative
The SDK renders Click to Pay above the form and adds a divider automatically. - Preserve visual order
Other pay buttons (Apple Pay, Google Pay, PayPal) go first, then Click to Pay, then divider, then card form. - Handle flow by events
Usemountedandsubmitevents withentityto distinguishclicktopayfromform. - Keep existing button setups unchanged
ExistingcontainerIdconfiguration for Apple Pay, Google Pay, and other buttons remains unchanged.
- Click to Pay button positioning directly above the form.
- Mandatory payment form collapse behavior after Click to Pay selection.
- Divider render and destroy lifecycle.
- Divider text localization by form locale.
- Layout consistency with other payment buttons.
You only need a payment form container for Click to Pay.
|
|
Other payment methods may use optional dedicated containers.
Integration steps
Use this sequence to integrate Click to Pay safely and keep layout behavior compliant with card-scheme requirements.
- Build the HTML layout
Render a payment form container. Add optional containers for other pay buttons if needed. - Initialize the SDK with Click to Pay enabled
PassclickToPayButtonParamsininit(). Do not definecontainerIdfor Click to Pay. - Subscribe to events
Usemounted,submit, anderrorevents and route behavior byevent.data.entity.
Step 1. Build HTML layout
You only need a container for the payment form.
|
|
Step 2. Initialize SDK
Enable Click to Pay in the SDK init() call. Keep other payment button settings unchanged.
clickToPayButtonParams in init(). The SDK positions Click to Pay automatically and does not require containerId.
|
|
Step 3. Subscribe to events
Subscribe to the lifecycle and submit events.
event.data.entity to separate Click to Pay from the card form and other button entities.
|
|
Use these examples as a baseline when wiring Click to Pay with other payment buttons.
|
|
|
|
|
|
|
|
The SDK exposes public CSS classes for divider styling:
click2pay-dividerfor divider container and horizontal linesclick2pay-divider-textfor divider text
Default SDK styles can be overridden.
|
|
|
|
Events and tracking
Subscribe to SDK events and route behavior by entity
- form card payment form
- clicktopay Click to Pay
- applebtn Apple Pay
- googlebtn Google Pay
- paypal PayPal
|
|
|
|
|
|
|
|
For internal analytics and status visibility, tag Click to Pay transactions with click-to-pay across callbacks, payment responses, and reporting views. This allows separate filtering from card-form and other pay-button transactions in dashboards and operational reports.
Limits and behavior
Current limitations:
- Click to Pay integration does not support host-to-host or recurring payments, so you cannot offer it for subscriptions or automatic top-ups.
- Click to Pay does not verify the card with the issuing bank or create a passkey before finalizing the transaction. Use standard 3DS handling unless your account has additional orchestration rules configured.
Use Click to Pay for customer-initiated one-time payments. Do not use Click to Pay tokens for merchant-initiated recurring transactions.
You can
Guide
Test every payment scenario including approvals, declines, 3DS challenges, and refunds in the sandbox before going live in production.
test
Click to Pay in the sandbox using the same approach as Apple Pay: enroll any real card, route it through the sandbox PSP, and complete the payment. Click to Pay does not have dedicated test cards or predefined test amounts.